VEHICLE, AND OTHERS INVOLVED AT THE TIME OF FAILURE.
| If there is any question about your skill, find a competent person to assist you. | |
| Step 1 | |
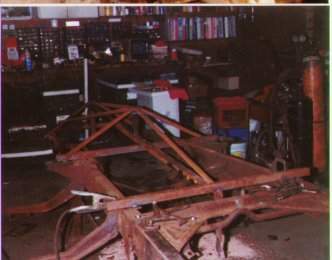 |
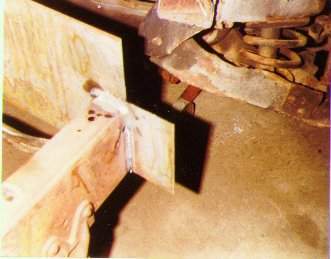
This is a jig made to locate the bumper mounting holes, and the core support mount. This has to be fastened to the frame in at least 3 places, behind the splice. If the cab is on, I recommend using the hood hinge mounts too. Triangulate the jig so it can't twist and move your points. |
| Step 2 | |
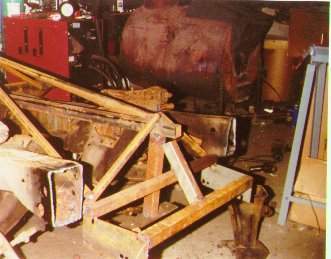 | This is the front of the jig showing where the bumper and core support mount. I move the bumper brackets to the inside of the frame, because the new frame section is much wider. |
| Step 3 | |
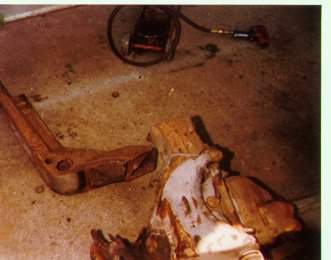 | This shows the area to make the cut on the donor frame clip. The frame section should be set level, and the cut marked perpendicular to the ground,and straight across from side to side. the cut is approximately 16" behind the center line of the spindles. Whatever the measurement is, record it for future use. Cut the frame as accurately as possible, I use a Sawsall with a metal cutting blade 9" long. |
| If there is any question about your skill, find a competent person to assist you. | |
| Step 4 | |
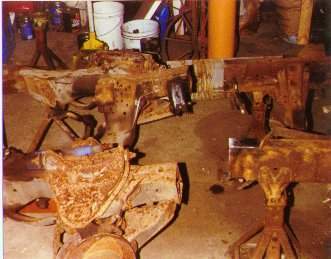 | Support the frame, level side to side, and with the amount of rake, front to rear, that you anticipate using. Mark the truck frame perpendicular to the ground,at a point 3/4" less than the measurement on your clip. In other words, if your clip measurement was 16", the frame measurement will be 15 1/4". This will move the wheels forward, but is needed, as an optical illusion is created that makes the wheels look like they are too far back if you don't do this. It is caused by the elliptical shape of the wheel opening. Make sure the frame won't move as the steps progress! Weld the frame to the stands if necessary. |
| Step 5 | |
 | Cut a 1/8" plate, accurately the width of the widest frame section,and high enough to reach from the bottom of the lowest frame section to the top of the highest frame section. With the top of the late front clip about 1/2" above the top of the truck frame, the truck will be lowered about 4" from the stock height. Weld the plate to the truck frame with an equal distance sticking out on each side, and the bottom of the plate even with the bottom of the frame. |
| Step 6 | |
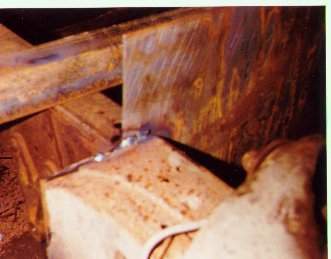 | Weld the front frame section to the plate, even with the ends of the plate, and flush with the top of the plate. Tack weld first, and recheck all measurements, twice, and then check them again. Recheck that everything is still square. Use an angle finder to check that the front clip is level |
back to top | Back to tech | back to index